https://www.w3schools.com/jquery/jquery_get_started.asp
jQuery Get Started
jQuery Get Started Adding jQuery to Your Web Pages There are several ways to start using jQuery on your web site. You can: Download the jQuery library from jQuery.com Include jQuery from a CDN, like Google Downloading jQuery There are two versions of jQuer
www.w3schools.com
<script src="https://ajax.googleapis.com/ajax/libs/jquery/3.5.1/jquery.min.js"></script>
jQuery Get Started -> Google CDN복사(회색배경색) <title>밑에 붙어넣기

복사한 다음 위에도 <script>가 있음 중복이 되니
이미 부트스트랩 템플렛에 JQuery가 쓰이고 미이 임포트가 되어있음
두번씩 임포트 할 필요는 없으니깐
<title>밑에 <script>은 지운다
- jQuery를 사용하는 방법
👉css와 마찬가지로, jQuery를 쓸 때에도 "가리켜야" → 조작할 수 있습니다.
예) 특정 인풋박스의 값을 → 가져와줘!
예) 특정 div를 → 안보이게 해줘!
css에서는 선택자로 class를 썼지요? jQuery에서는 id 값을 통해 특정 버튼/인풋박스/div/.. 등을 가리키게 됩니다.
5) 자주쓰는 jQuery들 다뤄보기
- 들어가기 전에 - 모든 jQuery를 외워야 하나요?
👉 절대!! 아닙니다. 예를 들어 스크롤 움직임을 감지한다거나, 화면 사이즈를 안다거나,
jQuery가 할 수 있는 일은 무척 많습니다.
1. input 박스의 값을 가져와보기
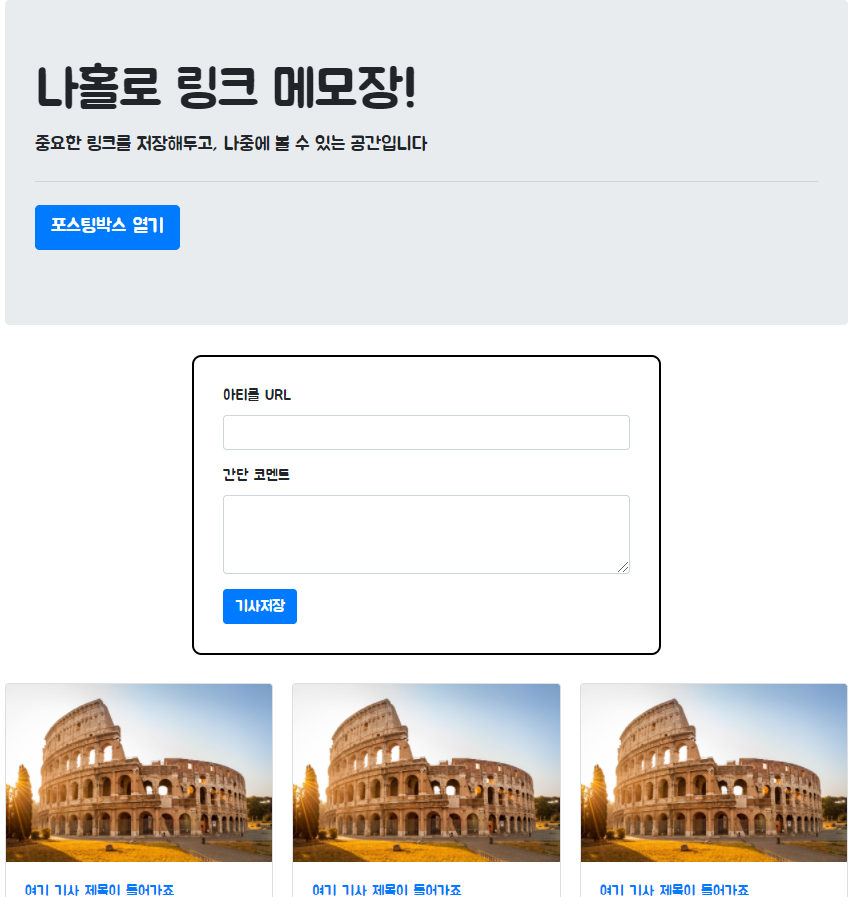
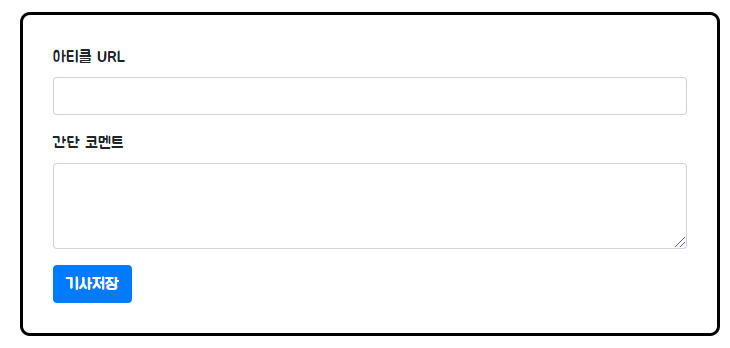
<div class="posting-box">
<div class="form-group">
<label for="exampleInputEmail1">아티클 URL</label>
<input id="article-url" type="email" class="form-control" aria-describedby="emailHelp" placeholder=""> </div>
<div class="form-group"> <label for="exampleInputPassword1">간단 코멘트</label>
<input type="password" class="form-control" placeholder="">
</div>
<button type="submit" class="btn btn-primary">기사 저장</button> </div>
<input id="exampleInputEmail1"
exampleInputEmail1 => article-url
<label for="exampleInputEmail1">에서 for="exampleInputEmail1" 다 지우기
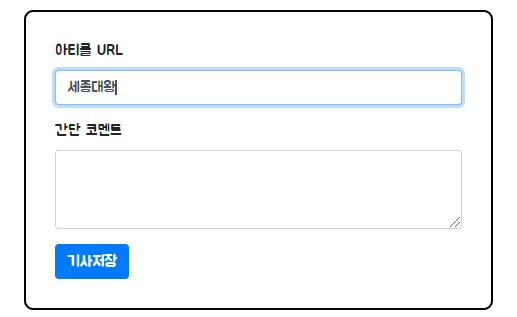
우선 콘솔창을 띄운다 아티클 URL에 세종대왕 엔터 콘솔창 보기
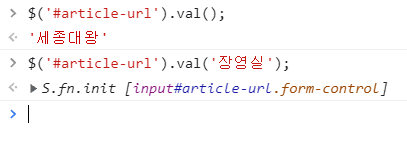
// 크롬 개발자도구 콘솔창에서 쳐보기
// id 값이 article-url인 곳을 가리키고, val()로 값을 가져온다. $('#article-url').val();
2. div 보이기 / 숨기기
<div class="posting-box" id="post-box">
<div class="form-group">
<label for="exampleInputEmail1">아티클 URL</label>
<input id="post-url" type="email" class="form-control" aria-describedby="emailHelp" placeholder="">
</div>
<div class="form-group"> <label for="exampleInputPassword1">간단 코멘트</label> <input type="password" class="form-control" placeholder=""> </div> <button type="submit" class="btn btn-primary">기사 저장</button> </div>
<div posting-box에 중첩하여 명찰달기 id="post-box"
새로고침 후에 콘솔창
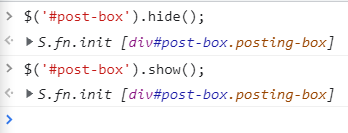
id 값이 post-box인 곳을 가리키고, hide()로 안보이게 한다. (=css의 display 값을 none으로 바꾼다)
$('#post-box').hide();//

▼show()로 보이게 한다.(=css의 display 값을 block으로 바꾼다) $('#post-box').show();
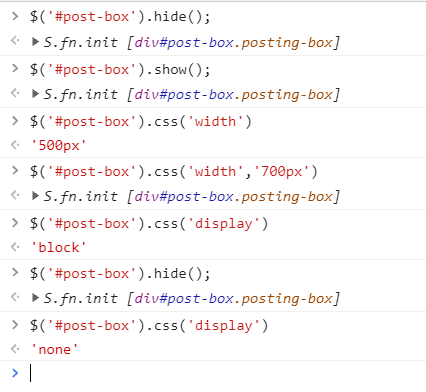

콘솔창에서 동적으로 크게 만들 수 있다 $('#posting-box').css('width','700px')
검정색테두리 박스가 존재하면 '블럭'
$('#post-box').css('display')
'block'
검정색테두리 박스를 지운다
$('#post-box').hide();
S.fn.init [div#post-box.posting-box]
검정색테두리 박스가 없으니 '논'
$('#post-box').css('display')
'none'
4. 태그 내 텍스트 입력하기
// 가리키고 싶은 버튼에 id 값을 준다음
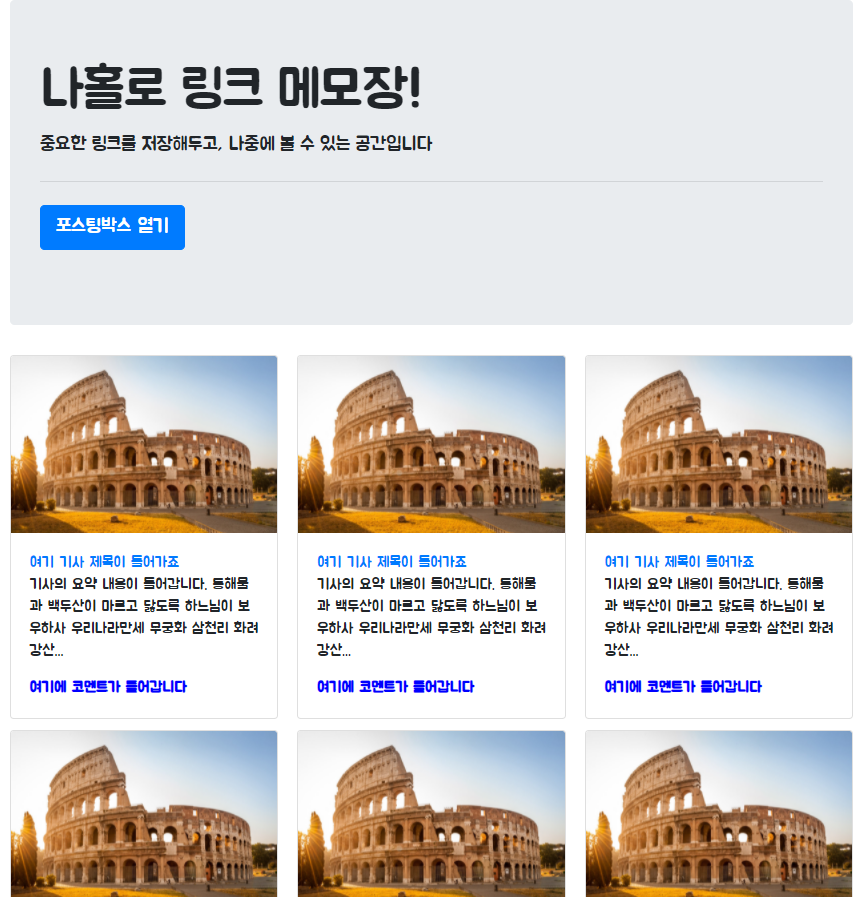
<button id="btn-posting-box" type="button" class="btn btn-primary">포스팅 박스 열기</button>
id="btn-posting-box" 입력
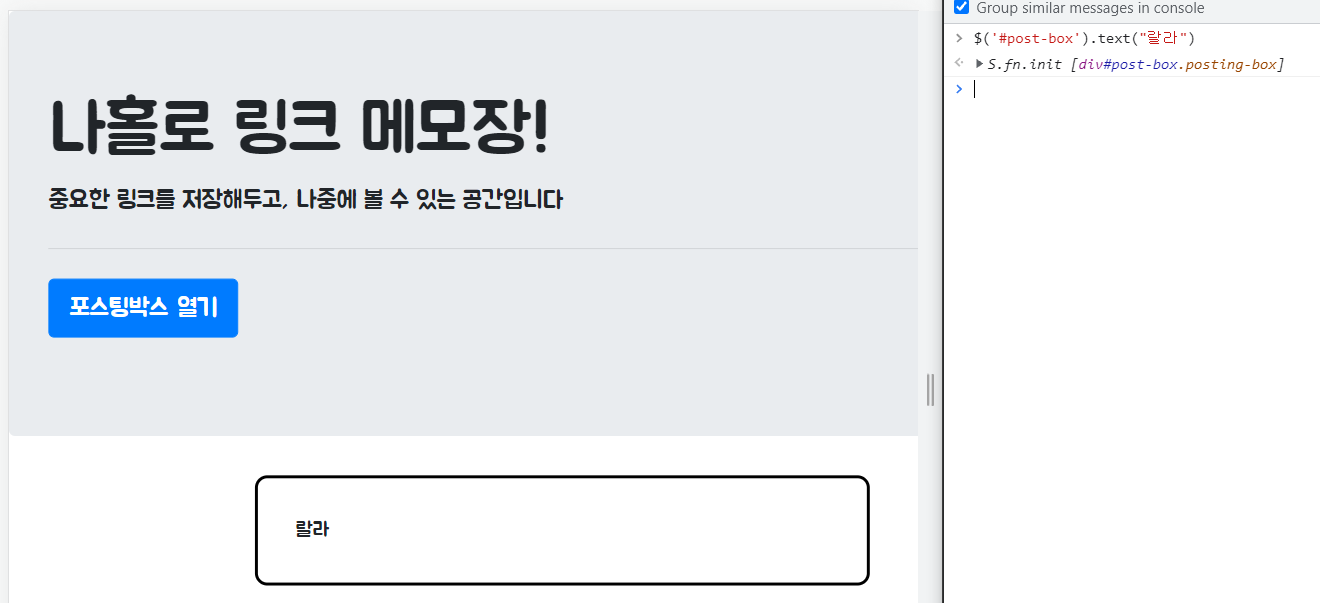
$('#post-box').text("랄라") 엔터
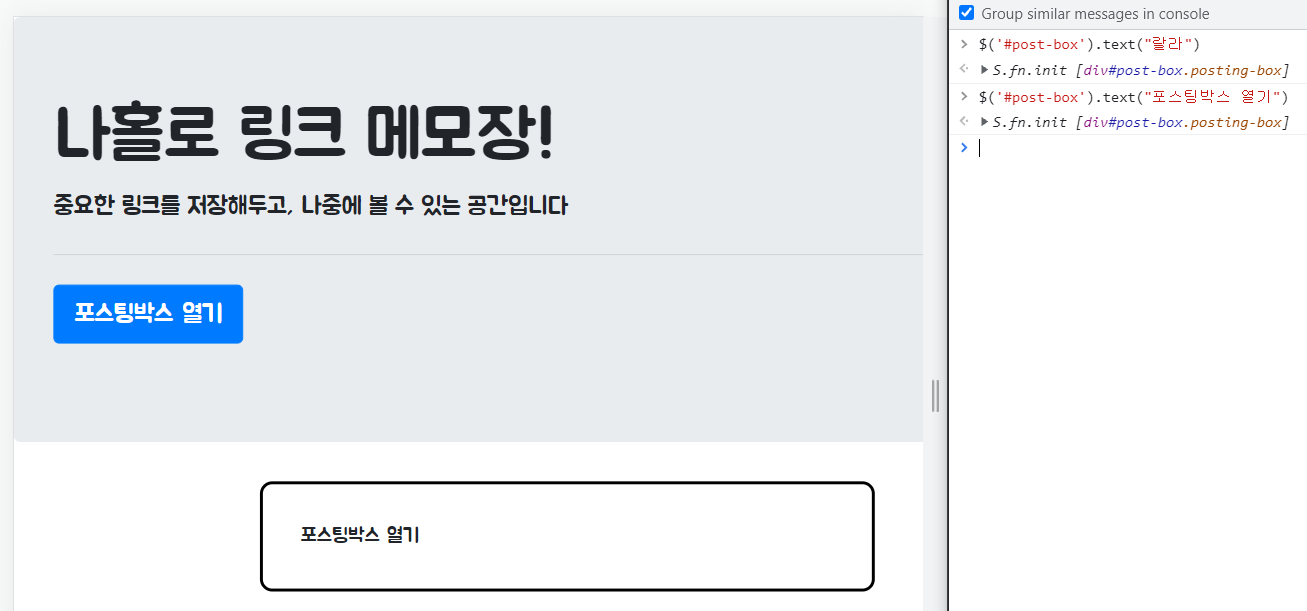
$('#post-box').text("포스팅박스 열기") 엔터
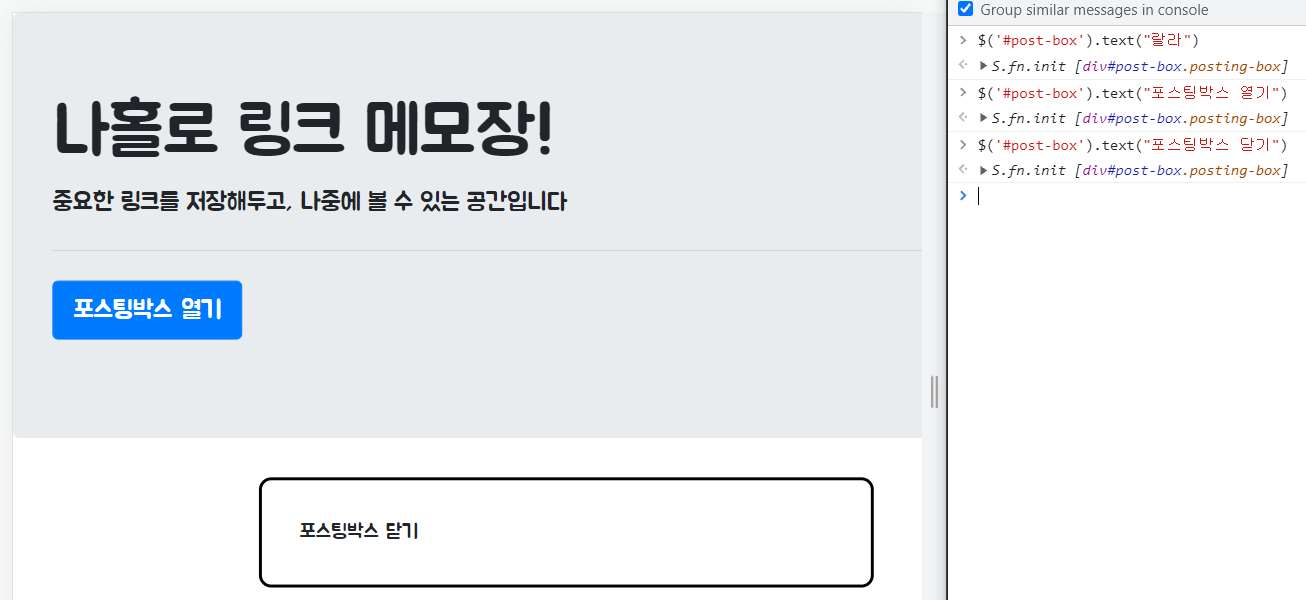
$('#post-box').text("포스팅박스 닫기")
5. 태그 내 html 입력하기
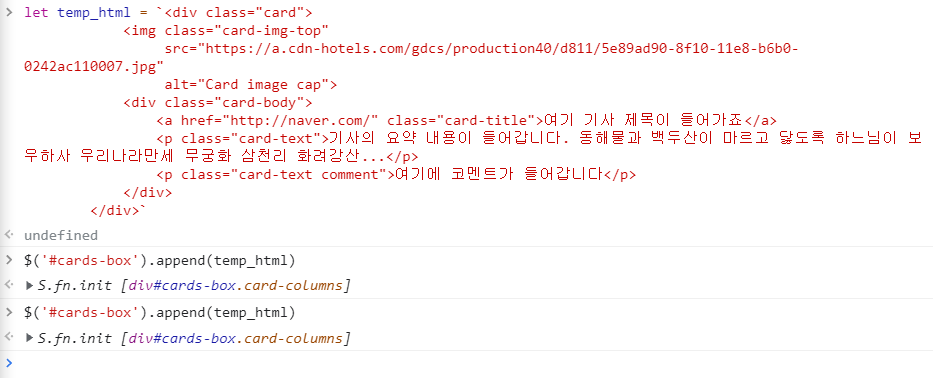
// 사이에 html을 넣고 싶은 태그에 id값을 준 다음 <div id="cards-box" class="card-columns">
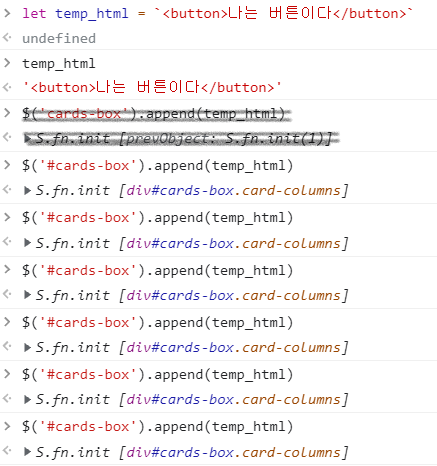
탭 위에 esc 밑에 있는 것을 (`)백틱이라 부름
(')백틱은 문자열로 만들어 준다
html처럼 생긴 문자열이다
검정색으로 표시한 부분은
실수한 부분
문자열을 html으로 변환시키는 방법
$('cards-box').append(temp_html)
우선 새로고침을 한다
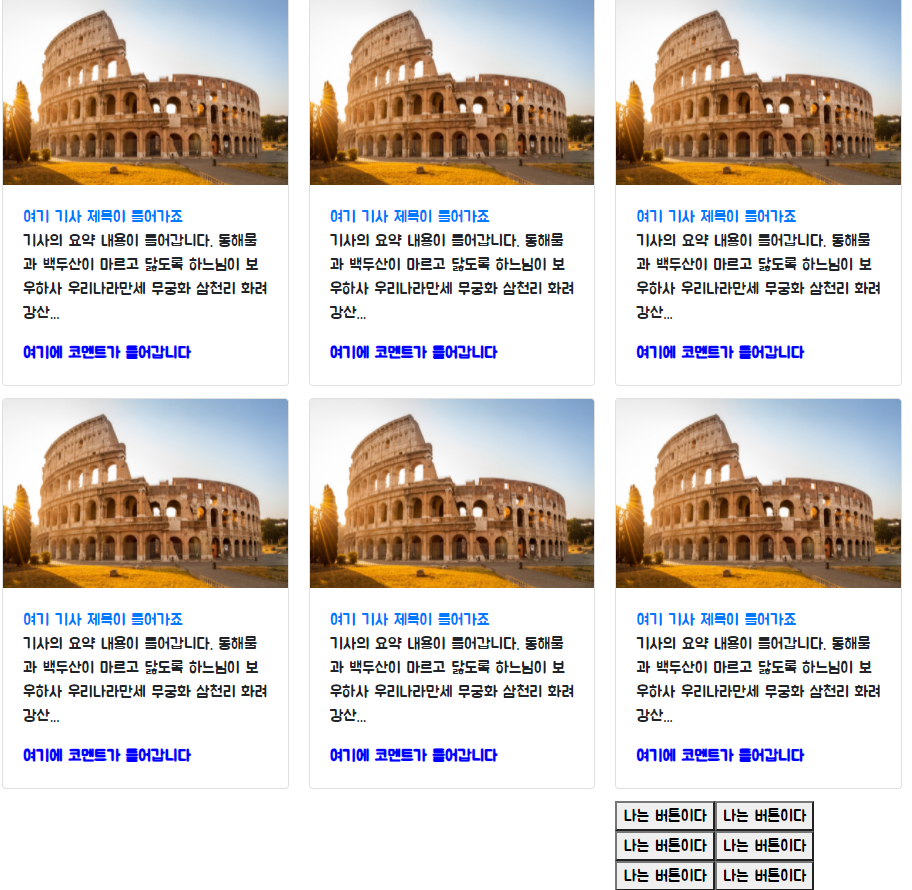
<div class="card">
<img class="card-img-top"
src="https://a.cdn-hotels.com/gdcs/production40/d811/5e89ad90-8f10-11e8-b6b0-0242ac110007.jpg"
alt="Card image cap">
<div class="card-body">
<a href="http://naver.com/" class="card-title">여기 기사 제목이 들어가죠</a>
<p class="card-text">기사의 요약 내용이 들어갑니다. 동해물과 백두산이 마르고 닳도록 하느님이 보우하사 우리나라만세 무궁화 삼천리 화려강산...</p>
<p class="card-text comment">여기에 코멘트가 들어갑니다</p>
</div>
</div>
복사한다
콘솔창 let temp_html = `` 백틱안에 붙어넣기 엔터 $('#cards-box').append(temp_html)
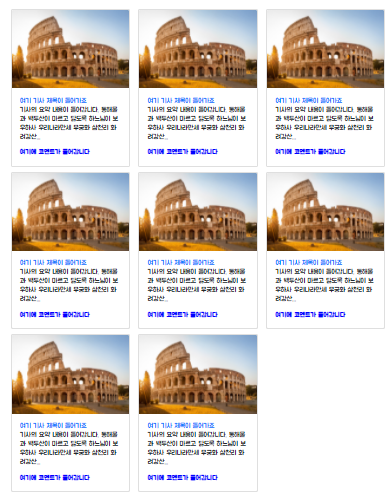
카드가 2개 더 늘어났다!!